|
Tell 3 Friends
I did one better
than that. I told 3 club mailing lists that I belong to (approx.
2000 members total) about your very interesting news letter.
Take care,
--
Rob
|
Hi Rob !
Thanks for your help !! I'm really fired up
about getting the sport of motorcycling the recognition it deserves.
Feel free to post the URL's of Power News newsletters to your
favorite newsgroups or forums.
Sincerely,
Pat McGivern
~MotoMan |
Back Issues
Hey MotoMan,
How can I access all the Power News past issues ??
Thanks,
Paul |
Hi Paul !
All 16 past issues are at the bottom of this
page. I do that on each new newsletter, so they don't get lost !!
Also, the list of upcoming topics can be found in the
"Dynamic
Horsepower Starring: Britney Spears"
Power News Issue.
Sincerely,
Pat McGivern
~MotoMan |
In the last issue of Power News, we learned that:
1: When an intake port is too big to provide the velocity
necessary to prevent blowback during the Charging phase, the result is a
loss of power at all RPM's. The secret to more power
is to make the ports smaller.
2: The
intake ports in most modern motorcycles are still
waay too big as they come from the factory !! ...Even for Roadracing use
!!
3: Thousands
of motorcycles are losing horsepower this winter,
as many tuners will make their intake ports even bigger !!
If this is your first issue of Power News, I recommend that you read last
month's edition first:
http://www.mototuneusa.com/think_fast.htm
|
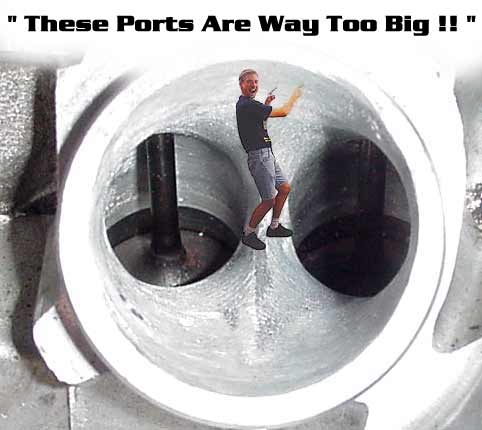 |
Here's a Honda F3 that was professionally
Flow Bench Ported (enlarged)
to the MAX !!
This bike was really, really slow !!
The head measures well on a Flow Bench, but the engine actually produced
Less Power with
this ported head than it did with the original stock head !!!
|
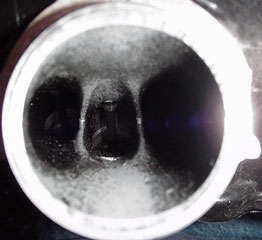
What Do High Velocity Intake
Ports Look Like ??
These never before seen photos show the
remarkable size difference
between stock and High Velocity Ports:
|
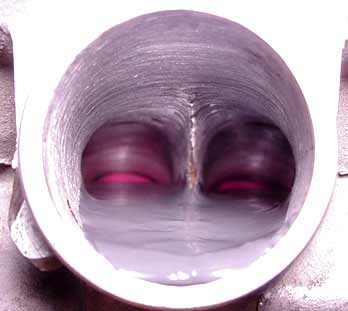
Before:
Stock Yamaha R6 Intake Port
|
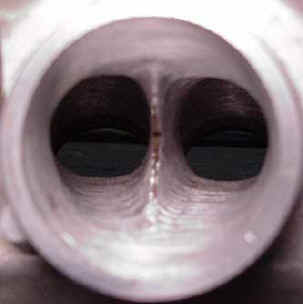
After:
30 Percent Reduced High Velocity
Yamaha R6 Intake Port |
High Velocity Intake Porting
On 5 Valve Heads:
Yamaha YZF 400's, R7 and R1, FZR 1000 & 750
|
Before:
Stock Yamaha R1 Intake Port |
After:
30 Percent Reduced High Velocity
Yamaha R1 Intake Port |
|
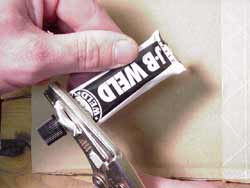
The Secret to
Making
Ports Smaller ??
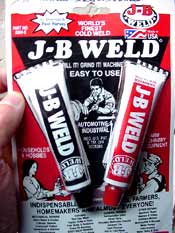
JB Weld Epoxy |
Epoxy !!
Epoxy is much easier to work with than welding, and it offers insulation
for the incoming fuel /air mixture. (Cooler mixture = denser
charge.)
This product does the best job of expanding & contracting with the
engine heat without cracking, or coming loose.
Other products that work well are Loctite "Metal Set" (available in
Europe) and Bondo automotive body filler.
I recommend the JB Weld because it sets up slowly, which can be a real
plus when you're first learning this porting technique.
|
Ready To Do It Yourself ??
Here's How:
|
|
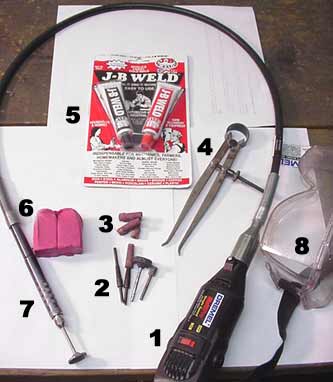
Recommended Tools
1) Dremel Tool
2) Tool Bits
( Sanding Roll, Stone,
Aluminum Cutter)
3) 60 Grit Coarse Sanding
Rolls
4) Caliper For Measuring Port Height
5) JB Weld (24 Hour Type)
6) Plastecine Modeling Clay
7) Dremel Extension Cable
8) Safety Goggles
( Keep Your Eyes !! ) |
|
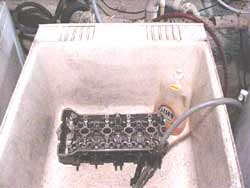
Clean Up First
(?)
That's right !! Any traces of oil will ruin the sanding rolls, and make the head an oily
mess to work on !!
So the first step is to wash out all the oil with dishwashing detergent
and hot water.
Use compressed air or a blow drier to prevent rust. |
.
.
,
. |
|
|
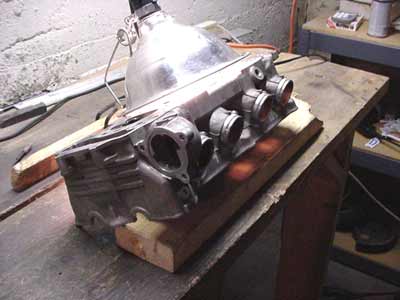
Secure The Head on
The Workbench
It's critical that the head is secure and stable.
It's very easy to ruin a valve seat if the head suddenly shifts while the
porting tool is turning at 24,000 RPM !
Use a 2X4 board to "wheelie" the head into the proper
position.
The clamp-on type light illuminates the ports from the combustion chamber
side.
. |
|
|
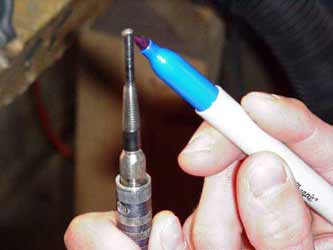
Get Centered
The end of this sanding mandrel is off center. The result will be
inefficient sanding action and chatter marks on the port surface.
Uneven wear on the sanding roll can cause it to unravel at high speed and
possibly damage the cylinder head.
Here, I'm using a marker to find out which way the mandrel is bent. By
lightly touching it with the marker while it's spinning, the ink will only show on the
"high" side.
|
|
Careful ...
By pressing the "inked" side it against the
bench, I'm bending the mandrel back slightly
to perfectly re-center it.
This takes a bit of practice, because it's easy
to bend the mandrel too much.
If you have to bend it more than 3 times,
throw it out and start over with a new one. They get weak from being bent, and can suddenly bend out 90 degrees while
spinning 24,000 RPM !! |
.
 |
|
Ready To Port !!
|
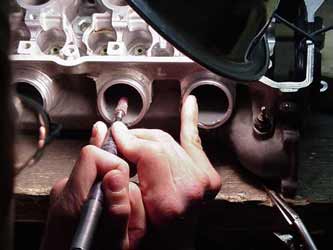 |
Here's the best way to hold the tool. I let the dremel
motor hang over my right shoulder, and hold onto the drive cable with
both hands.
The bottom of my hands are pushing slightly against the bench to help
steady the tool.
Also, notice that I've anchored my right hand with my little finger. This
gives the best combination of power and control. With some practice, you
can really let the sanding roll "torque" into the metal without
losing control. |
|
|
|
|
Use a griding stone to grind the steel valve guide.
Many newer models' valve guides are already flush, so you get to skip this
step.
|

|
|
,
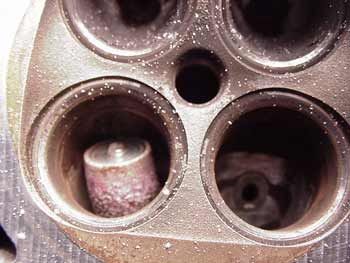 |
Once most of the steel guide is ground down, use sanding
rolls to make the aluminum boss & valve guide flush with the port
roof.
Then, finish the entire port surface using 60 grit sanding rolls. |
|
.
,

.
Rough Finish /Grooved Floor |
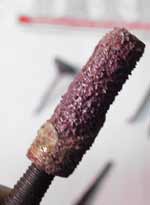
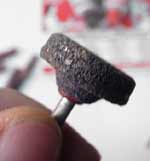
60 Grit (Coarse) Sanding Roll
Use it to remove the fuel residue, and create a rough
port surface.
|
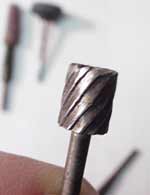
Aluminum Cutter
Use it to score the port floor to secure the epoxy.
|
|
Why Not Polish The
Ports ??
Doesn't Air Flow Better on a Smooth Surface
???
Remember that the ultimate goal
isn't "flow" ... it's POWER !!
The intake port is going to flow both fuel and air. The problem with fuel
is that, since it weighs more, it's difficult to keep it evenly mixed with
the air as it follows the contours of the port.
Boundary Layer
The next time you drive a car in the rain, notice that when the car is
going 60 MPH, the rain drops go up the hood of the car at walking speed.
That's because the smooth surface of the car creates what's known as a
boundary layer, and the portion of that layer of air that's nearest to the
surface is almost still.
The same thing happens inside an intake port. Except instead of raindrops,
it's fuel droplets that will run down the port wall slower than the air.
That causes a serious change in the fuel air mixture by the time it
reaches the cylinder, ruining much of the engine's potential power.
Polishing the port walls will ensure that this happens.
The phrase "Port & Polish" always makes me laugh ... I think
the idea came from 70's Hot Rod magazines or something. Anyways, the last
thing you want to do is polish your ports !!!
Instead, by making a series of rough 60 grit lines that purposely go against
the flow, the "boundary layer area" will be turbulent, and the
fuel will stay suspended in the air.
Remember: Rough is Good !! |
|
Okay: now that the 1st part of the process is
complete,
it's time to prep the head for epoxy - ing.
First: Wash & Dry The Head Again !!
To remove all the sanding dust and
aluminum chips...
|
|
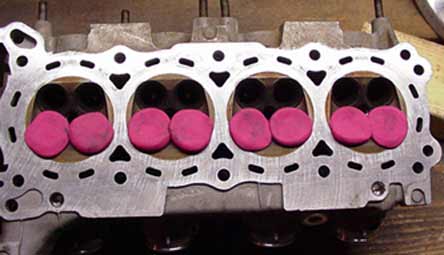
Here's what the clay is used for !!
It keeps the liquid epoxy from flowing out and onto the valve seats. |
|

|
Next, set the head up so that the floors of all 4 ports
are level.
On most heads with downdraft ports, the head will have to be "wheelied"
as shown here. |
Epoxy Mess Avoidance !!
The hardest part about the next
process is not getting yourself covered with epoxy !!
My advice is to wear old clothes, and keep a fresh roll of paper towels on hand
!
Here's a few more tricks I can share with you:
|
|
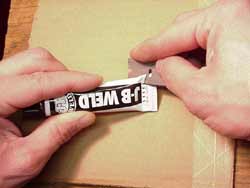
Cold epoxy is super hard to squeeze out of the small cap end of the tube
!!
So, to get it all out as easily as possible, I open the JB Weld tubes
backwards. Using a razor to cut open the bottom...
|
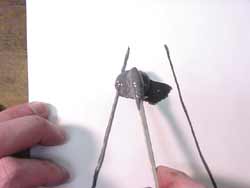
|
Then, I use a vise-grip pliers to squeeze out all the
goo onto a sheet of cardboard.
You'll use about 1 package of 2 tubes each (steel &
hardener) per port.
Mix up one at a time.
|
|
|
Ying & Yang
|
Mix It Up !!
|
|

|
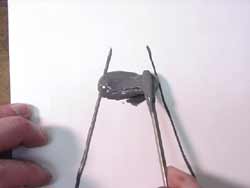
,
.
Clean the screwdriver completely, then twirl up a blob
as in the photo on the left.
Keep rotating that screwdriver !!!
Remember: The minute you stop, the blob
will drop !!
Application
The idea is to add the epoxy to the deepest point first and then back up.
I add the epoxy in "rows". The first row will flow down onto the
clay barrier. |
|
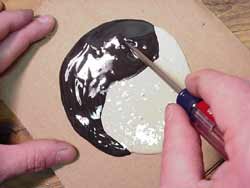
|
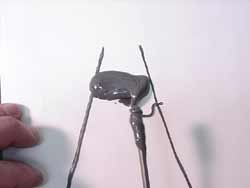
It was impossible to get a clear photo as I added epoxy
into the port, so I'm demonstrating it here on paper.
To avoid bubbles, start on the left side, and rotate the screwdriver as
you "lay down" the epoxy. |
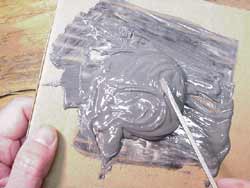
|
|
Be sure to make the epoxy a little thicker on the sides.
|
|
|
Then when the right side is reached, twist the
screwdriver as you back it away. That keeps the last strand of epoxy from
getting out of control. |
Here's What it Should Look Like So Far:
|
|

Preview: The Finished Port.
|
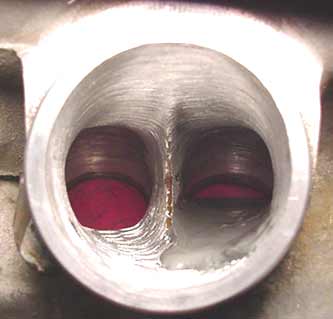
Now as almost all of the
epoxy is added,
you can really see the size difference !!
Notice that the epoxy is slightly higher where it
meets
the side walls, to avoid air bubbles.
|
Don't Miss The Next Issue:
Finishing The Ports !!
|
|
2 Ways You Can Help Mototune USA !!
If You've Gotten

Forwarded To You By a Friend...
Please Sign Up To Get Future Issues !
|

Whoa ...
There's 16 More Back
Issues !!
For Best Results, Read Them All: